
holydancerÕăÕêø´╝îÕªéÚ£ÇÞ¢¼Þ¢¢´╝îÞ»ÀÕ£¿µÿ¥Þªüõ¢ìþ¢«µ│¿µÿÄ´╝Ü
Þ¢¼Þç¬holydancerþÜäCSDNõ©ôµáÅ´╝îÕăµûçÕ£░ÕØÇ´╝Ühttp://blog.csdn.net/holydancer/article/details/7417030
 
Õ£¿androidõ©¡µêæõ╗¼õ©ÇÞê¼þö¿intentµäÅÕø¥µØÑÕ£¿ÕÉäõ©¬viewõ╣ïÚù┤ÞÀ│Þ¢¼´╝îÕ£¿õ╗ÑÕëìþÜäiosÕ╝ÇÕÅæõ©¡´╝îÕªéµ×£ÞªüÕ«×þÄ░ÚÇëÚí╣ÕìíÕêçµìóÕñÜÞºåÕø¥´╝îÚ£ÇÞªüþö¿Õê░õ©Çõ©¬þÄ░Õ£¿Xcodeþëêµ£¼õ©¡µ▓íµ£ëþÜ䵿íµØ┐Window-Based Applicationµ¿íµØ┐´╝îþäÂÕÉÄÕ£¿ÚçîÚØóÕ╗║õ©ÇÕáåþÜäviewControllerÕÆîxibµûçõ╗´╝îþäÂÕÉÄÕåìõ©ÇÚí┐þÜäþîøÞ┐×´╝îµû░µëïÕê░Þ┐ÖÚçîÕ¥ÇÕ¥Çõ╝ÜÕ¥êþùøÞïªÒÇéþÄ░Õ£¿ÕÑ¢õ║å´╝îµû░þëêþÜäXcodeõ©¡þÜäTabbed Applicationµ¿íµØ┐ÕÅ»õ╗Ñþ«ÇÕìòµÿÄõ║åþÜäÕêøÕ╗║õ©Çõ©¬ÚÇëÚí╣ÕìíÕñÜÞºåÕø¥´╝îþöÜÞç│µêæõ╗¼Úâ¢õ©ìÚ£ÇÞªüõ╗╗õ¢òµôìõ¢£ÒÇé
õ©ïÚØóµêæõ╗¼ÕàêµëôÕ╝ÇXcode´╝îþäÂÕÉÄÚÇëµï®Þ»Ñµ¿íµØ┐ÕêøÕ╗║Úí╣þø«´╝Ü

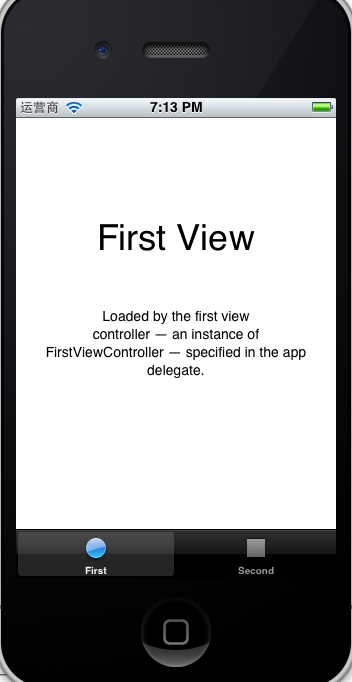
ÕêøÕ╗║µêÉÕèƒÕÉÄþø┤µÄÑÞ┐ÉÞíîÕ░▒õ╝ÜÕ£¿ÞÖܵ£║õ©èÕç║þÄ░õ©Çõ©¬ÚÇëÚí╣Õìí´╝êõ©ñõ©¬ÚÇëÚí╣´╝ë´╝îþé╣Õç╗Õ░▒õ╝ÜÕêçµìóõ©ìÕÉîþÜäview´╝ø
 
þÄ░Õ£¿µêæõ╗¼µØÑÕêåµ×Éõ©Çõ©ïÞ┐Öõ©¬µ¿íµØ┐´╝îõ║åÞºúÕÉĵêæõ╗¼Õ░▒ÕÅ»õ╗ÑÕê®þö¿Þ»Ñµ¿íµØ┐µØÑÕêøÕ╗║µêæõ╗¼Þç¬ÕÀ▒þÜäÕ║öþö¿õ║åÒÇé
ÚªûÕàê޻ѵ¿íµØ┐Õ╣µ▓íµ£ëõ©╗xibµûçõ╗´╝îµëÇõ╗ѵêæõ╗¼ÞªüÕÄ╗AppDelegateõ©¡µƒÑþ£ïµÿ»Õªéõ¢òõ╗úþáüþöƒµêÉþÜä´╝îÕ£¿Þ»Ñþ▒╗þÜäÕú░µÿÄõ©¡µêæõ╗¼ÕÅæþÄ░Õªéõ©ïõ╗úþáü´╝Ü
AppDelegate.h:
 
- #import <UIKit/UIKit.h>  
-   
- @interface AppDelegate : UIResponder <UIApplicationDelegate, UITabBarControllerDelegate>  
-   
- @property (strong, nonatomic) UIWindow *window;  
-   
- @property (strong, nonatomic) UITabBarController *tabBarController;  
-   
- @end  
UIWindowõ©ïÚØóÕ░▒µÿ»õ©Çõ©¬UITabBarController,Þ┐ÖÚçîÕ╣Âõ©ìµÿ»µêæõ╗¼Õ©©ÞºüþÜäviewController´╝îÞÇîµÿ»õ©Çõ©¬UIViewControllerþÜäÕ¡Éþ▒╗ÒÇéÞ»Ñþ▒╗þÜäÕú░µÿÄÕªéõ©ï´╝Ü
 
 
- UIKIT_CLASS_AVAILABLE(2_0) @interface UITabBarController : UIViewController <UITabBarDelegate, NSCoding> {  
-   @package  
-     UITabBar               *_tabBar;  
-       
-     UIView                 *_containerView;  
-     UIView                 *_viewControllerTransitionView;  
-   
-     id                      _tabBarItemsToViewControllers;  
-     UIViewController       *_selectedViewController;  
-   
-     UINavigationController *_moreNavigationController;  
-     NSArray                *_customizableViewControllers;  
-       
-     id<UITabBarControllerDelegate> _delegate;  
-       
-     UIViewController       *_selectedViewControllerDuringWillAppear;  
-           
-     UIViewController       *_transientViewController;  
-       
-     NSUInteger              _maxItems;  
-       
-     struct {  
-     unsigned int isShowingMoreItem:1;  
-     unsigned int needsToRebuildItems:1;  
-     unsigned int isBarHidden:1;  
-     unsigned int editButtonOnLeft:1;  
-     } _tabBarControllerFlags;  
- }  
õ╗Äõ©èÚØóµêæõ╗¼ÕÅ»õ╗ÑÕÅæþÄ░´╝î޻ѵĺÕêÂÕÖ¿µÿ»Þç¬Õ©ªõ©Çõ©¬UITabBarþÜä´╝îÞÇîõ©öÚçîÚØóµÿ»µ£ëUIViewControllerõ¢£õ©║Õ▒׵ǺþÜäÒÇéþÄ░Õ£¿µêæõ╗¼µØÑþ£ïAppDelegateþÜäÕ«×þÄ░´╝Ü
 
AppDelegate.m:
 
- #import "AppDelegate.h"  
-   
- #import "FirstViewController.h"  
-   
- #import "SecondViewController.h"  
- #import "ThirdViewController.h"  
-   
- @implementation AppDelegate  
-   
- @synthesize window = _window;  
- @synthesize tabBarController = _tabBarController;  
-   
- - (void)dealloc  
- {  
-     [_window release];  
-     [_tabBarController release];  
-     [super dealloc];  
- }  
-   
- - (BOOL)application:(UIApplication *)application didFinishLaunchingWithOptions:(NSDictionary *)launchOptions  
- {  
-     self.window = [[[UIWindow alloc] initWithFrame:[[UIScreen mainScreen] bounds]] autorelease];//1  
-     // Override point for customization after application launch.  
-     UIViewController *viewController1 = [[[FirstViewController alloc] initWithNibName:@"FirstViewController" bundle:nil] autorelease];//2  
-     UIViewController *viewController2 = [[[SecondViewController alloc] initWithNibName:@"SecondViewController" bundle:nil] autorelease];//3  
-       
-    // UIViewController *viewController3 = [[[ThirdViewController alloc] initWithNibName:@"ThirdViewController" bundle:nil] autorelease];//4  
-       
-     self.tabBarController = [[[UITabBarController alloc] init] autorelease];//5  
-     self.tabBarController.viewControllers = [NSArray arrayWithObjects:viewController1, viewController2, viewController3,nil];//6  
-     self.window.rootViewController = self.tabBarController;//7  
-     [self.window makeKeyAndVisible];//8  
-     return YES;  
- }  
-   
-   
- @end  
µ▓íþö¿Õê░þÜäµû╣µ│òÞó½µêæÕêáµÄë´╝îþÄ░Õ£¿õ©╗ÞªüµØÑþ£ïÕ║öþö¿ÕêØÕºïÕîûµû╣µ│ò
 
õ╗úþáü1ÕêØÕºïÕîûþ¬ùÕÅú´╝ø
õ╗úþáü2ÕêØÕºïÕîûview1þÜäµÄºÕêÂÕÖ¿´╝ø
õ╗úþáü3ÕêØÕºïÕîûview2þÜäµÄºÕêÂÕÖ¿´╝ø
õ╗úþáü4µÿ»µêæÞç¬ÕÀ▒ÕÉĵØÑÕèáþÜä´╝îÞ┐ÖÚçîÕàêõ©ìþ«í´╝ø
õ╗úþáü5ÕêØÕºïÕîûµá╣ÞºåÕø¥µÄºÕêÂÕÖ¿´╝êÞ┐ÖµùÂÕŬµÿ»õ©ÇÞê¼þÜäÞºåÕø¥µÄºÕêÂÕÖ¿´╝ë´╝ø
õ╗úþáü6Õ░åÚéúõ©ñõ©¬ÞºåÕø¥þÜäµÄºÕêÂÕÖ¿µÀ╗Õèáõ©║µò░þ╗äþ╗Öõ║åµá╣ÞºåÕø¥µÄºÕêÂÕÖ¿þÜäviewControllersÕ▒׵Ǻ´╝îõ╗Ñõ¥┐µÿ¥þñ║´╝ø
õ╗úþáü7Õ░åµá╣ÞºåÕø¥ÕÖ¿Þ¢¼µ¡ú´╝êþ£ƒµ¡úµêÉõ©║µá╣ÞºåÕø¥µÄºÕêÂÕÖ¿´╝ë´╝ø
õ╗úþáü8µÿ¥þñ║þ¬ùÕÅú´╝ø
ÕŪÕñû´╝îÚÇëÚí╣Õìíõ©èþÜäÚÇëÚí╣µûçÕ¡ùÕÆîÕø¥µáçµÿ»Õ£¿µ»Åõ©Çõ©¬viewþÜäviewControllerÕêØÕºïÕîûµû╣µ│òÚçîþí«Õ«ÜþÜä´╝îµ»öÕªé´╝Ü
FirstViewController.m:
 
- - (id)initWithNibName:(NSString *)nibNameOrNil bundle:(NSBundle *)nibBundleOrNil  
- {  
-     self = [super initWithNibName:nibNameOrNil bundle:nibBundleOrNil];  
-     if (self) {  
-         self.title = NSLocalizedString(@"First", @"First");  
-         self.tabBarItem.image = [UIImage imageNamed:@"first"];  
-     }  
-     return self;  
- }  
 
- self.title = NSLocalizedString(@"First", @"First");  
õ©èÚØóÞ┐ÖÞíîõ╗úþáüµÿ»þ╗ÖµáçÚóÿ´╝îNSLocalizedStringµû╣µ│òÕŬµÿ»õ©Çõ©¬Õ«ÅÕ«Üõ╣ë´╝îþ¼¼õ║îõ©¬ÕÅéµò░µùáþö¿´╝îõ¢áõ╣ƒÕÅ»õ╗Ñþø┤µÄÑself.title = @"FirstÔÇØÞ┐ÖµáÀµØÑÞÁïÕÇ╝ÒÇé
 
ÕÑ¢õ║å´╝îõ©èÚØóÞ┐Öõ║øµ¿íµØ┐µÿ»þ│╗þ╗ƒþ╗Öµêæõ╗¼þÜä´╝îÕîàµï¼Õø¥µáçþ┤áµØÉ´╝îµêæõ╗¼õ╣ƒÕñºµªéõ║åÞºúõ║åµÿ»µÇĵáÀµÀ╗ÕèáviewÕê░Õ║öþö¿ÚçîÕÆîÚÇëÚí╣Õìíõ©èþÜäÚÇëÚí╣Õ»╣Õ║ö´╝îµêæõ╗¼þÄ░Õ£¿µØѵëïÕè¿ÕåìµÀ╗Õèáõ©Çõ©¬view
ÚªûÕàê´╝îµû░Õ╗║õ©Çõ©¬viewController´╝îÕÅûÕÉìõ©║ThirdViewController´╝îµ│¿µäÅÚÖäÕ©ªxibµûçõ╗ÂÒÇé
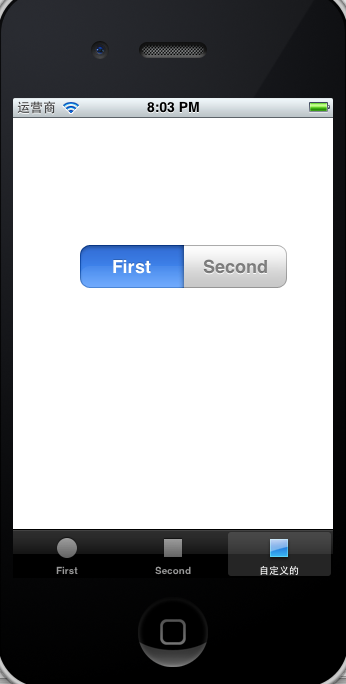
þäÂÕÉÄÕ£¿xibµûçõ╗Âõ©¡µïûõ©èõ©Çõ©¬segmentedµÄºõ╗´╝êÚÜÅõ¥┐õ╗Çõ╣êÚâ¢Þíî´╝ë´╝îÕ░åBottom BarÚéúõ©ÇµáÅõ┐«µö╣õ©║Tab Barþö¿õ╗Ñõ©║ÚÇëÚí╣ÕìíþòÖÕç║õ¢ìþ¢«´╝êÕÑ¢õ╣áµâ»´╝ë´╝îÕªéõ©ïÕø¥

Õ£¿ThirdViewController.mõ©¡ÕêØÕºïÕîûµû╣µ│òõ©¡Þ«¥þ¢«ÚÇëÚí╣ÕÉìÕÆîÕø¥µáç´╝Ü
 
- - (id)initWithNibName:(NSString *)nibNameOrNil bundle:(NSBundle *)nibBundleOrNil  
- {  
-     self = [super initWithNibName:nibNameOrNil bundle:nibBundleOrNil];  
-     if (self) {  
-           
- ┬á┬á┬á┬á┬á┬á┬á┬áself.title=@"Þç¬Õ«Üõ╣ëþÜä";┬á┬á
-   
-         self.tabBarItem.image = [UIImage imageNamed:@"second"];  
- ┬á┬á┬á┬á┬á┬á┬á┬á//Þ┐ÖÚçîµêæõ╗¼Õ░▒þö¿ÕÆîþ¼¼õ║îõ©¬õ©ÇµáÀþÜäÕø¥þëç┬á┬á
-   
-     }  
-     return self;  
- }  
 
þÄ░Õ£¿Õ░åAppDelegateµûçõ╗ÂÕ£¿ÕăµØÑþÜäÕƒ║þíÇõ©èÕüÜÕªéõ©ïõ┐«µö╣´╝Ü
1´╝îÕ»╝Õàѵû░Õ╗║þ▒╗ThirdViewControllerþÜäÕñ┤µûçõ╗´╝ø
2´╝îÕ░åÞ»Ñþ▒╗Õ«×õ¥ïÕîû,Õ»╣Þ▒íÕÉìµîëµâ»õ¥ïÕÅûÕÉìõ©║viewController3;
3´╝îÕ░åÕ«×õ¥ïÕîûÕÉÄþÜäviewController3ÕèáÕê░µò░þ╗äÚçîÒÇé
 
- #import "AppDelegate.h"  
-   
- #import "FirstViewController.h"  
-   
- #import "SecondViewController.h"  
- #import┬á"ThirdViewController.h"//µû░Õó×┬á┬á
-   
- @implementation AppDelegate  
-   
- @synthesize window = _window;  
- @synthesize tabBarController = _tabBarController;  
-   
- - (void)dealloc  
- {  
-     [_window release];  
-     [_tabBarController release];  
-     [super dealloc];  
- }  
-   
- - (BOOL)application:(UIApplication *)application didFinishLaunchingWithOptions:(NSDictionary *)launchOptions  
- {  
-     self.window = [[[UIWindow alloc] initWithFrame:[[UIScreen mainScreen] bounds]] autorelease];  
-     // Override point for customization after application launch.  
-     UIViewController *viewController1 = [[[FirstViewController alloc] initWithNibName:@"FirstViewController" bundle:nil] autorelease];  
-     UIViewController *viewController2 = [[[SecondViewController alloc] initWithNibName:@"SecondViewController" bundle:nil] autorelease];  
-       
- ┬á┬á┬á┬áUIViewController┬á*viewController3┬á=┬á[[[ThirdViewController┬áalloc]┬áinitWithNibName:@"ThirdViewController"┬ábundle:nil]┬áautorelease];//µû░Õó×┬á┬á
-       
-     self.tabBarController = [[[UITabBarController alloc] init] autorelease];  
- ┬á┬á┬á┬áself.tabBarController.viewControllers┬á=┬á[NSArray┬áarrayWithObjects:viewController1,┬áviewController2,┬áviewController3,nil];//µÀ╗Õèá┬á┬á
-     self.window.rootViewController = self.tabBarController;  
-     [self.window makeKeyAndVisible];  
-     return YES;  
- }  
-   
-   
- @end  
ÕÑ¢õ║å´╝îÞºüÞ»üÕÑçÞ┐╣Õɺ´╝Ü
 
Þ┐Öµùµêæõ╗¼Õ░▒Õ«×þÄ░õ║åÕ£¿þ│╗þ╗ƒµ¿íµØ┐þÜäÕƒ║þíÇõ©èµÀ╗Õèáview´╝îõ╣ƒÕÅ»õ╗Ñõ┐«µö╣Õăµ£ëþÜä´╝îÞ┐ÖµáÀÕ░▒ÕÅ»õ╗ÑÕ¥êþ«ÇÕìòþÜäÕ£¿ÕñÜõ©¬ÞºåÕø¥õ╣ïÚù┤Þ┐øÞíîÕêçµìó´╝îso easyÒÇé
 
Õà│Úö«Õ¡ù´╝ÜIphone ´╝îIOS ´╝îIphoneÕ╝ÇÕÅæ ´╝îÕƒ║þíÇ ´╝îÚÇëÚí╣ÕìíµáÅ ┬á´╝îUITabBar ´╝îÕñÜÞºåÕø¥Õêçµìó ´╝îÞç¬Õ«Üõ╣ëÕñÜÞºåÕø¥Õêçµìó┬á


þø©Õà│µÄ¿ÞìÉ
AnroidþÜäTabbed layouts Õ╝ÇÕÅ浿íµØ┐´╝îõ║▓Þç¬Þ░âÞ»òÚÇÜÞ┐ç´╝îÕÅ»õ╗ÑÕƒ║µ£¼µ¡ñµ¿íµØ┐þö¿CsharpÞ┐øÞíîAndroidÞ¢»õ╗ÂÕ╝ÇÕÅæ
ÚÇÜÞ┐çandroid studioÕ«×þÄ░RecyclerViewÕÆîTabbed Activityõ©Äþé╣Õç╗õ║ïõ╗Â
þ¢æÚíÁþëê tabbed postman õ¢┐þö¿µûçµíú
Ôùå µÄóÞ«¿Õ£¿Master-Detail Applicationõ©¡õ¢┐þö¿Þí¿ÞºåÕø¥þÜäµèǵ£» Ôùå Õêåõ║½Õà│õ║ĵûçõ╗ÂÕñäþÉåÕÆîµò░µì«Õ║ôÕ¡ÿÕé¿þÜäÕ╗║Þ«« Ôùå µÂÁþøûÕÉäþºìõ╝áµäƒÕÖ¿þÜäÞ«┐Úù«µû╣µ│òÕÅèÕÉäþºìµëïÕè┐þÜäÞ»åÕê½µû╣µ│ò Ôùå þñ║ÞîâÕªéõ¢òõ¢┐þö¿Google MapsÒÇüÚÇåÕÉæÕ£░þÉåþ╝ûþáüÒÇüµÀ╗Õèáµ│¿Þ«░þ¡ëµ×ä Õ╗║Õƒ║õ║Ä...
javascriptÕ«×þÄ░þÜäMini Tabbed PagesÚøàÞÖÄTABµòêµ×£µ║Éþáü
µá╣µì«Android studioµÅÉõ¥øþÜäTabbed Activityµ¿íµØ┐ÕêøÕ╗║Úí╣þø«Õ╣ÂÞ┐øÞíîþ¿ìÕ¥«õ┐«µö╣ÒÇé ÚíÂÚ⿵ÿ»toolbar´╝îõ©¡Úù┤µÿ»TabLayout´╝îÕ║òÚ⿵ÿ»viewpager
µá╣µì«Android studioµÅÉõ¥øþÜäTabbed Activityµ¿íµØ┐ÕêøÕ╗║Úí╣þø«Õ╣ÂÞ┐øÞíîþ¿ìÕ¥«õ┐«µö╣ÒÇé ÚíÂÚ⿵ÿ»toolbar´╝îõ©¡Úù┤µÿ»TabLayout´╝îÕ║òÚ⿵ÿ»viewpager
ASP.NET MVC Tabbed Menu Control.Source Code. http://www.dev102.com/2009/04/14/creating-a-tabbed-menu-control-for-aspnet-mvc/
chromeFOR.COM_tabbed-postman-rest-clien_v0.8.4.19 Þ░Àµ¡îµÅÆõ╗Â
xcodeÚ½ÿþëêµ£¼õ©¡µ£ëõ║øµ¿íµØ┐µ▓íµ£ëõ║å´╝îµ£¼ÞÁäµ║ÉÕîàÕɽempty application,category,class extension,protocol þ¡ëµ¿íµØ┐´╝îÞºúÕÄïÕÉÄÕ░åµëÇڣǵ¿íµØ┐µïÀÕàÑ/Contents/Developer/Platforms /iPhoneOS.platform/Developer/Library/Xcode/...
µæÿÞªü:Þäܵ£¼ÞÁäµ║É,jQuery,µ╗æÕè¿Õêçµìó,Tab,µáçþ¡¥ÕêçµìóÒÇÇTabbed content with jQuery´╝îõ©Çµ¼¥þö▒jQueryÕÆîtabbedContent.jsµÅÆõ╗ÂÕ«×þÄ░þÜätabµáçþ¡¥µ╗æÕè¿Õêçµìóµòêµ×£´╝îÚ╝áµáçµ╗æÞ┐çõ©ìÕÉîþÜäÕêåµáŵùÂÞç¬Õè¿Õêçµìó´╝îµòêµ×£µÁüþòàÕ╣│µ╗æ´╝îÚØ×Õ©©ÚÇéÕÉêµÿ¥þñ║Þí¿µá╝þ▒╗ÕåàÕ«╣...
ActivityÒü«þ«ÇÕìòÕ©âÕ▒ÇÕêçµìó
Õ¥êÕÑ¢Õ¥êÕ«×þö¿þ¢æþ½Ötabbedõ╗úþáü´╝îÕîàµï¼JSõ╗úþáüÕÆîCSSõ╗úþáüÒÇéÕ©îµ£øÞâ¢Õ»╣õ¢áµ£ëÕ©«Õè®ÒÇé
TabµáÅþø«Õêçµìó´╝êTabbed Navigation´╝ëµÿ»õ©ÇþºìÕ£¿þö¿µêÀþòîÚØóõ©¡Õ©©ÞºüþÜäÕ»╝Þꬵû╣Õ╝Å´╝îþö¿õ║ÄÕ£¿ÕñÜõ©¬þø©Õà│ÕåàÕ«╣µêûÕèƒÞâ¢õ╣ïÚù┤Þ┐øÞíîÕêçµìóÒÇéÕ«âÚÇÜÕ©©õ╗ѵ░┤Õ╣│µêûÕ×éþø┤µÄÆÕêùþÜäµáçþ¡¥Õ¢óÕ╝ÅÕ▒òþñ║´╝îÕàüÞ«©þö¿µêÀþé╣Õç╗õ©ìÕÉîþÜäµáçþ¡¥µØѵÁÅÞºêÕÆîÕêçµìóÕåàÕ«╣ÒÇé
µÄºõ╗ÂÕÉìMDIFormTabCtrl.dll(MDIÕ¡Éþ¬ùÕÅúþ«íþÉåµÄºõ╗Â),þö¿VS2008(C# Framework2.0)Õ╝ÇÕÅæ,õ¢┐þö¿µ¡ñµÄºõ╗ÂÕÅ»õ╗ÑÕ«×þÄ░õ╗Ñõ©ïþ¬ùÕÅúµáÀÕ╝Å´╝Ü360Õ«ëÕ࿵ÁÅÞºêÕÖ¿ÒÇüVS2003ÒÇüVS2005ÒÇüVS2008 õ╗ÑÕÅè Þç¬Õ«Üõ╣ëµáÀÕ╝Å´╝êÕÅ»ÚÜŵäÅÞ«¥þ¢«Þç¬Õ«Üõ╣ëµáÀÕ╝Å´╝îÕŬڣÇ4õ©¬Õø¥þëçÕ░▒Þâ¢...
Õòåõ©Üþ╝ûþ¿ï-µ║Éþáü-ÕñܵûçµíúþòîÚØó(MDI)µ║Éõ╗úþáü tabbed_views_demo.zip
TabbedViewPager AppBar + SlidingTabLayout + ViewPager ##Õ«ëÞúà - Õ«ëÞúà#õ¢┐þö¿ Android Studio Õ╝ÇÕÅæ´╝îAndroid 2.2+Õ£¿ build.gradle þÜäõ¥ØÞÁûÚí╣õ©¡ÕèáÕàÑ dependencies { compile ' libs.ben:tabbed-viewpager:1.2.0 '}µ│¿µäÅ...
In this paper wewill present an introduction fo tabbed lines and their applicationto crosstalk mitigation and impedance management. Followingthat, simulation results are presented showing ...
Õ«ëÕìôþ╗ÅÕà©Õ╝ÇÕÅæµíêõ¥ï(3-9(Tab Tabbed menu)Õƒ║õ║Äþº╗Õè¿þ╗êþ½»þÜäµ║Éõ╗úþáü
Þ░Àµ¡îµÁÅÞºêÕÖ¿µÅÆõ╗Âpostman´╝îÕ╝ÇÕÉ»Õ╝ÇÕÅæÞÇൿíÕ╝Å´╝îÕèáÞ¢¢ÕÀ▓þ╗ÅÞºúÕÄïþÜäµûçõ╗´╝îÕ«ëÞúàµêÉÕèƒÒÇé